
 Mac 终端(terminal) oh-my-zsh+solarized配置
本片文章只记录个人平时换新设备配置系统 terminal 过程,个人觉得 Mac 系统的终端足够日常中使用,也有用过 iTem2,也不错,个人喜好,进入正文:
# 功能
- 语法高亮
- 命令行 tab 补全
- 自动提示符
- 显示 Git 仓库状态
- 当然还有优美的界面
# 配色方案
使用 Solarized 的主题配色方案点击 👇 官网下载链接:
# Click here to download latest version
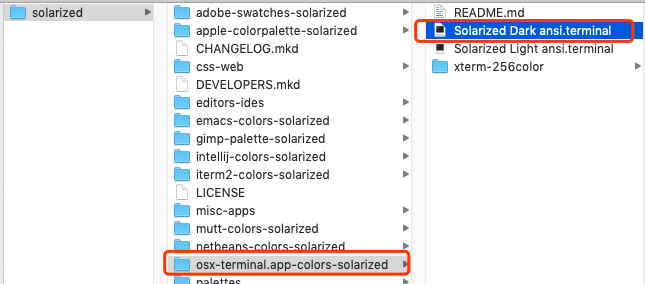
得到解压目录:双击安装 Solarized Dark ansi.terminal
# 安装 oh-my-zsh
使用 crul 安装:
sh -c "$(curl -fsSL https://raw.github.com/robbyrussell/oh-my-zsh/master/tools/install.sh)"
或使用 wget:
`sh -c "$(wget https://raw.githubusercontent.com/robbyrussell/oh-my-zsh/master/tools/install.sh -O -)"
# 主题
安装成功后,用 vim(或者在根目录下找到并)打开隐藏文件 .zshrc ,修改主题为 agnoster:
ZSH_THEME="agnoster"
应用 agnoster 这个主题需要特殊的字体支持,否则会出现乱码情况,这时我们来配置字体:
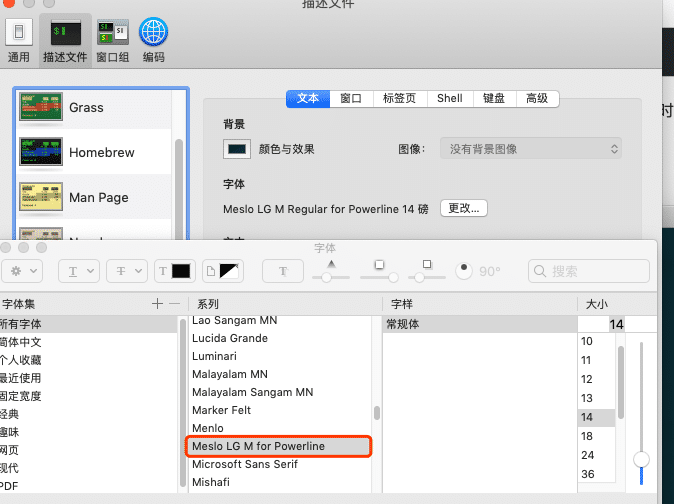
下载安装 Meslo 字体
在 terminal 中应用 Meslo 字体:
agnoster 为大多数人使用的主题,我个人用的是 ys, 可以去 oh-my-zsh 官网选择其他主题
# 自动提示命令配置
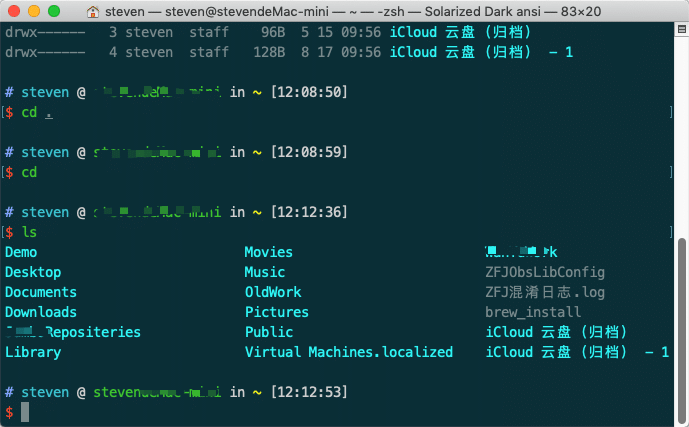
- 效果:
当我们输入命令时,终端会自动提示你接下来可能要输入的命令,这时按 → 便可输出这些命令,非常方便,如图:

- 完成自动提示功能如下:
1. 克隆仓库到本地 ~/.oh-my-zsh/custom/plugins 路径下
cd ~/.oh-my-zsh/custom/plugins
git clone https://github.com/zsh-users/zsh-autosuggestions.git
2
2. 用 vim(或者在根目录下找到并)打开 .zshrc 文件,找到插件设置命令,默认是 plugins=(git) ,我们把它修改为:
plugins=(zsh-autosuggestions git)

# 语法高亮配置
1. 使用 homebrew 安装 zsh-syntax-highlighting 插件。
brew install zsh-syntax-highlighting
2. 配置.zshrc 文件,插入一行。
source /usr/local/share/zsh-syntax-highlighting/zsh-syntax-highlighting.zsh
3. 输入命令。
source ~/.zshrc
PS:
# 安装 homebrew 包管理工具:
原来方案失效
现在可以直接用 cunkai 的 https://gitee.com/cunkai/HomebrewCN/
# Homebrew国内源
苹果电脑标准安装脚本:(推荐 优点全面 缺点慢一点)
/bin/zsh -c "$(curl -fsSL https://gitee.com/cunkai/HomebrewCN/raw/master/Homebrew.sh)"
苹果电脑极速安装脚本:(优点安装速度快 缺点update功能需要命令修复 )
/bin/zsh -c "$(curl -fsSL https://gitee.com/cunkai/HomebrewCN/raw/master/Homebrew.sh)" speed
Linux 标准安装脚本:
rm Homebrew.sh ; wget https://gitee.com/cunkai/HomebrewCN/raw/master/Homebrew.sh ; bash Homebrew.sh
苹果电脑卸载脚本:
/bin/zsh -c "$(curl -fsSL https://gitee.com/cunkai/HomebrewCN/raw/master/HomebrewUninstall.sh)"
Linux卸载脚本:
rm HomebrewUninstall.sh ; wget https://gitee.com/cunkai/HomebrewCN/raw/master/HomebrewUninstall.sh ; bash HomebrewUninstall.sh
---Brew介绍
macOS 和 Linux 缺失软件包的管理器
---Homebrew 能干什么?
使用 Homebrew 安装 Mac(或Linux)没有预装但你需要的东西。
--Homebrew自身如何使用
知道软件包具体名称,直接 brew install 软件包名
只知道一小部分名称,用 brew search 小部分名称 查询即可
例如brew search chrome就会把带chrome的软件包全部列出
--Homebrew中的扩展cask如何使用
假设安装firefox运行:
brew install --cask firefox
cask的图形化软件一般国内没有任何缓冲,下载很慢。
-------------------------分割线------------------------------
下面弃用:
1. 下载源到本地
curl -fsSL https://raw.githubusercontent.com/Homebrew/install/master/install >> brew_install
2. 修改镜像源
将
~~BREW_REPO = "https://github.com/Homebrew/brew".freeze~~
修改为(如果没有找到的 CORE_TAP_REPO 的话直接复制)
BREW_REPO = "https://mirrors.tuna.tsinghua.edu.cn/git/homebrew/brew.git".freeze~~
~~CORE_TAP_REPO = "https://mirrors.tuna.tsinghua.edu.cn/git/homebrew/homebrew-core.git".freeze
2
3. 控制台输入
/usr/bin/ruby brew_install
这里用的是中科院的源,可能会出现
~~fatal: early EOF
fatal: index-pack failed
Error: Failure while executing; `git clone https://github.com/Homebrew/homebrew-core /usr/local/Homebrew/Library/Taps/homebrew/homebrew-core --depth=1` exited with 128.
Error: Failure while executing; `/usr/local/bin/brew tap homebrew/core` exited with 1.
Failed during: /usr/local/bin/brew update --force~~
2
3
4
5
需要执行
~~git clone git://mirrors.ustc.edu.cn/homebrew-core.git/ /usr/local/Homebrew/Library/Taps/homebrew/homebrew-core --depth=1~~
4. homebrew-core 的镜像地址也设为中科院的国内镜像
cd "$(brew --repo)"
git remote set-url origin https://mirrors.ustc.edu.cn/brew.git
cd "$(brew --repo)/Library/Taps/homebrew/homebrew-core"
git remote set-url origin https://mirrors.ustc.edu.cn/homebrew-core.git
// 更新
brew update
2
3
4
5
6
-------------------------分割线------------------------------